


|
ANLEITUNG IN DEUTSCH INSTALLIEREN Practical tutorial : Vital tip – Automatically combine a Color Profile “Default Preset” and an “Adaptive ISO Preset”
|
My Color profiles (on sale here) are also compatible with Adobe Camera Raw (Photoshop ACR plug-in). I recall here the installation procedure, for the three Adobe software that allow you to use them :
- Adobe Lightroom Classic (after version 7.3 April 2018)
- Adobe Lightroom (Cloud)
- Adobe Camera Raw (the ACR module built into Photoshop)
If you have any question or problem, please do not hesitate to contact me here. Thank you.
![]() Warning: these profiles are not compatible with Lightroom 6 and previous versions : in definitive licenses without subscription.
Warning: these profiles are not compatible with Lightroom 6 and previous versions : in definitive licenses without subscription.

| CANON PROFILE ⎪ NIKON PROFILE ⎪ FUJIFILM PROF. ⎪ SONY PROFILE ⎪ PANASONIC PROF. ⎪ LEICA PROFILE ⎪ APPLE PROFILE ⎪ OTHERS ⎪ ISO ADAPTATIF ⎪ NEGATIVE FILM PROF. |
Easy installation in Lightroom Classic and Photoshop (ACR) *: on Mac and PC
- After purchase download the files which are compressed in the form of a “.zip” archive
- Unzip the “.zip” archive by double-clicking on it
- Open Lightroom and go to Preferences> in Presets ****
- Click on “Display the Predefined Parameters folder of the Development Module” ( fig. 1 )
- Open the “Settings” folder ( fig. 2 )
- Drag the content (the .xmp files) from the “PROFILS BY PHOTOETMAC” folder to “Settings” ( fig. 3 )
- Restart Lightroom Classic
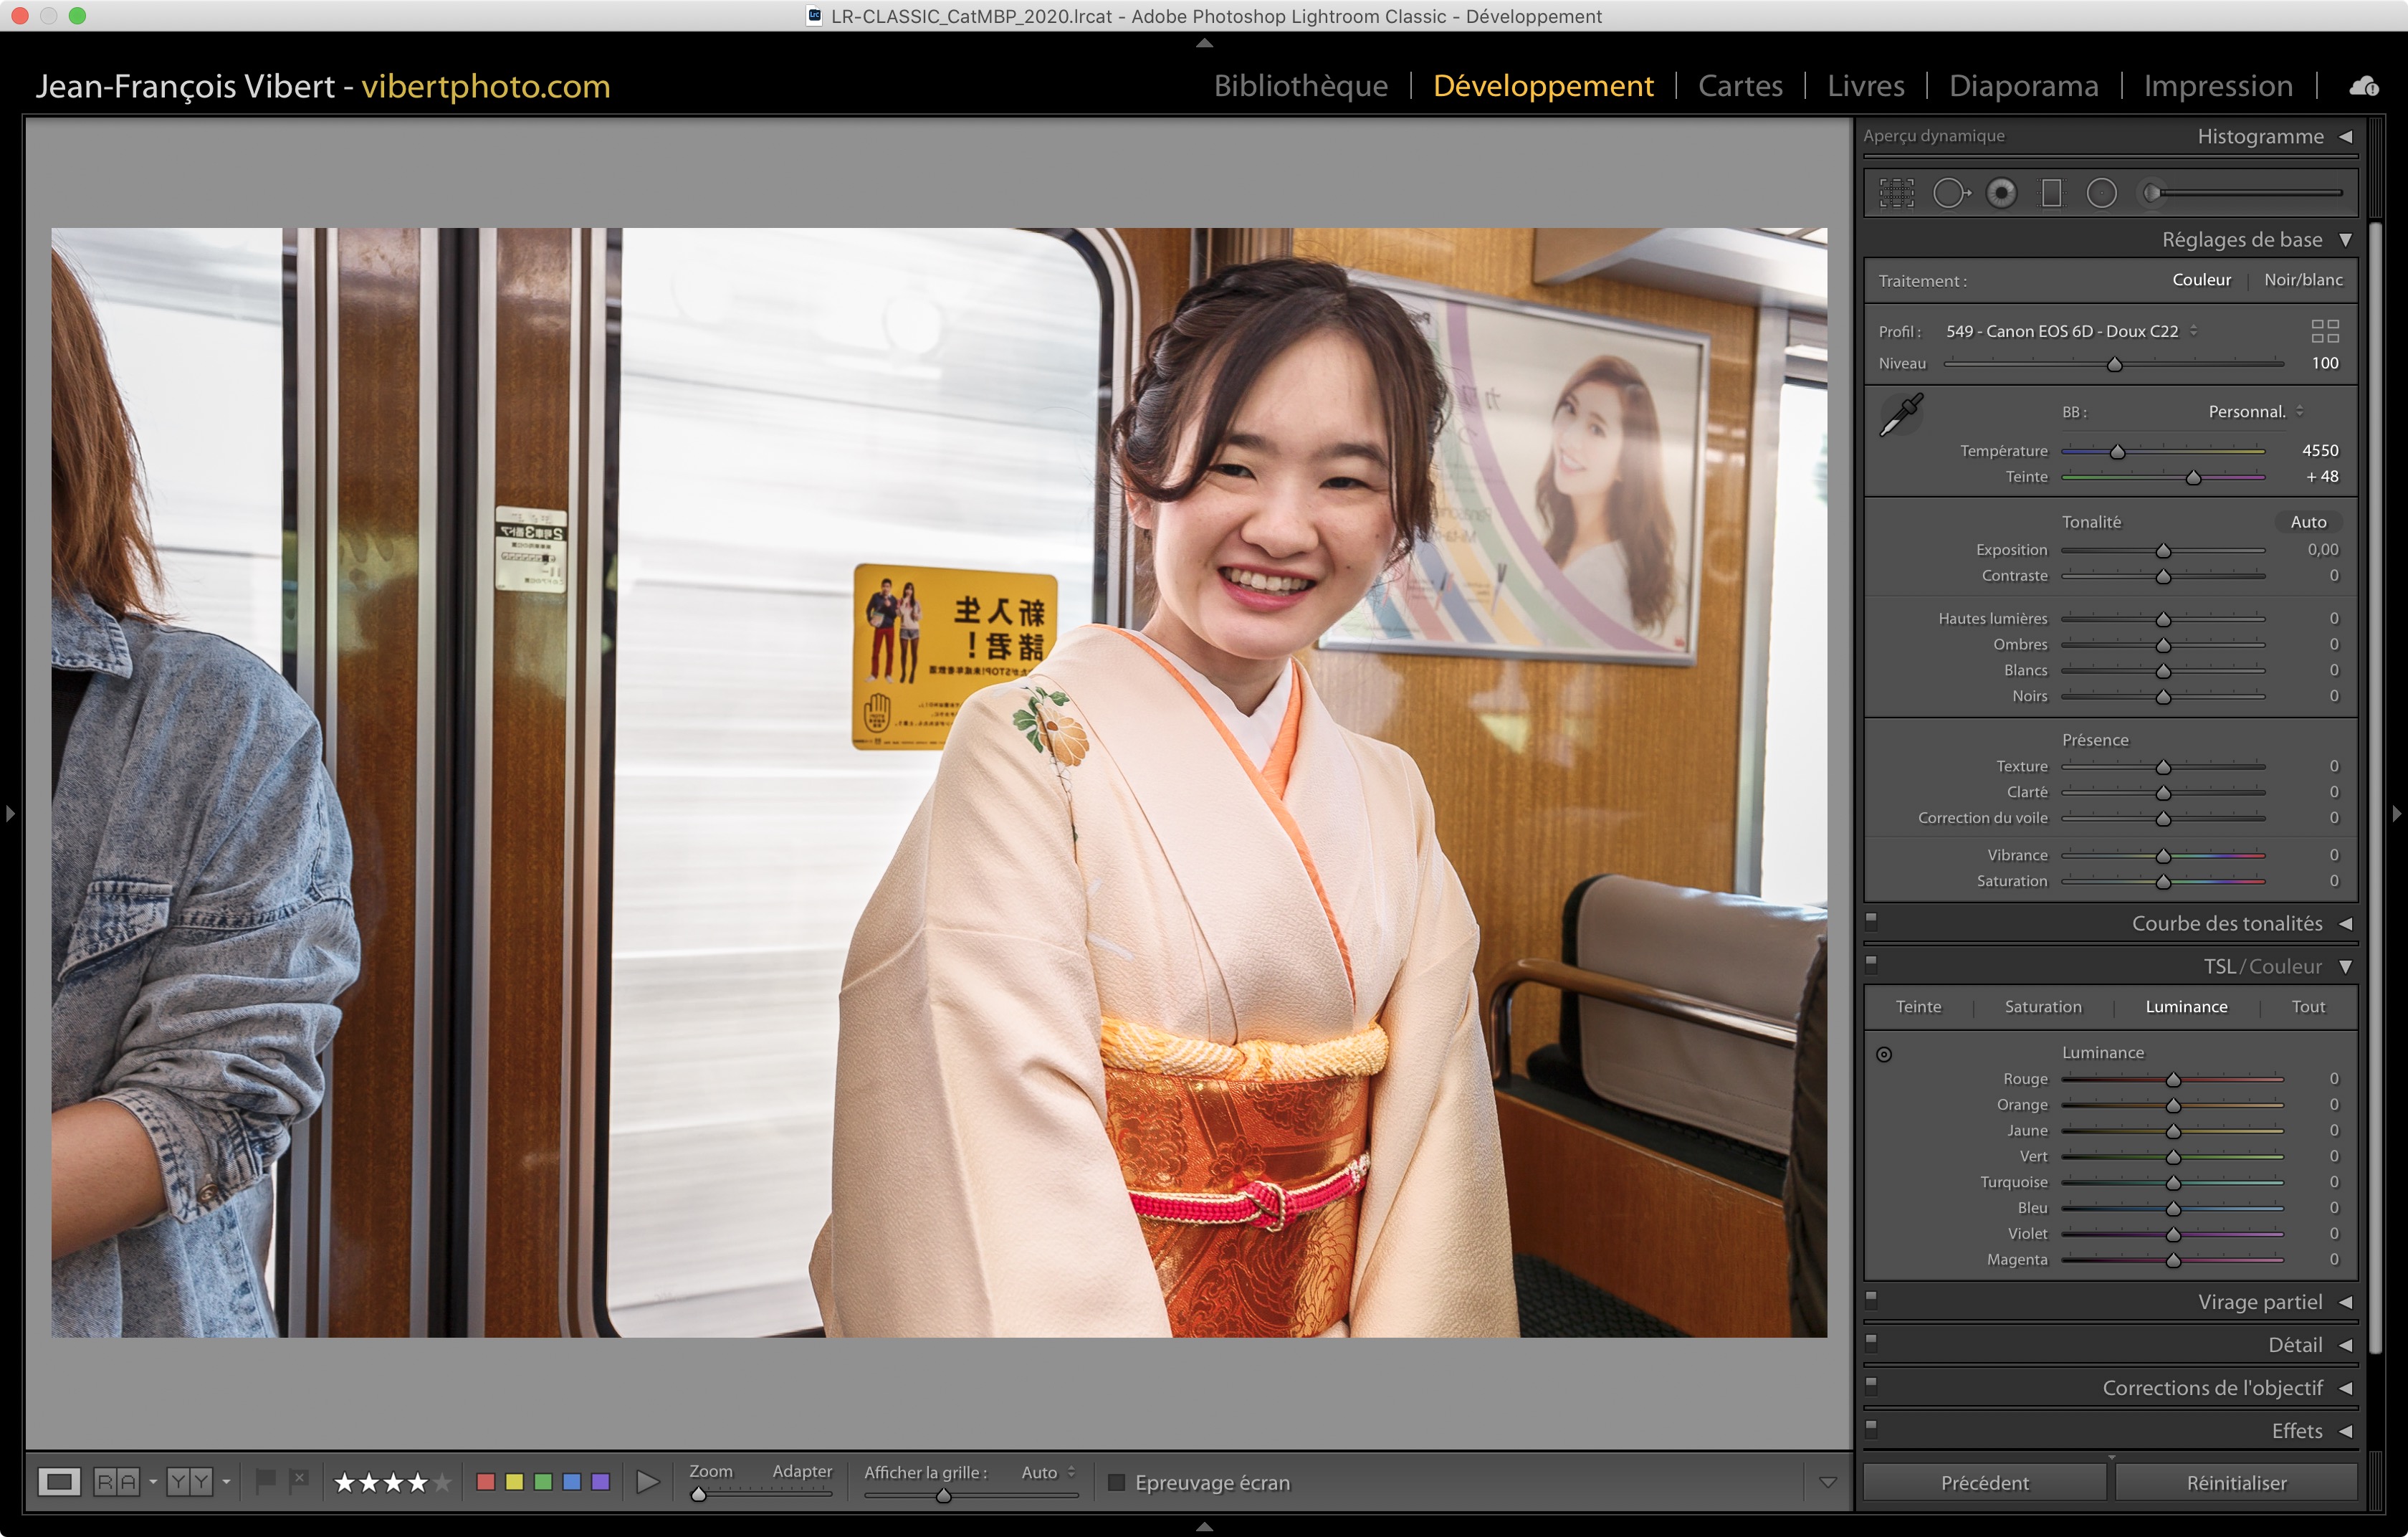
- Select a RAW file* (from the right camera**) and go to “Development”
- Open the Profile Explorer to find the group of new profiles ( fig. 4 )
Optional: remember to add them to your “Favorite Profiles” by clicking on the little star ( fig. 5 )


* Profiles do not work with JPEGs.
** They only work with RAW from the device for which they are intended. If you can’t find the profiles in the list, first check that the open RAW matches the purchased profile.
*** The procedure is almost identical for Photoshop in Adobe Camera Raw .
**** Note: I recommend Lightroom Classic users to uncheck the option “Store Presets with Catalog”. Which is in the “Predefined Parameters” tab in the Preferences (it is fortunately unchecked by default).
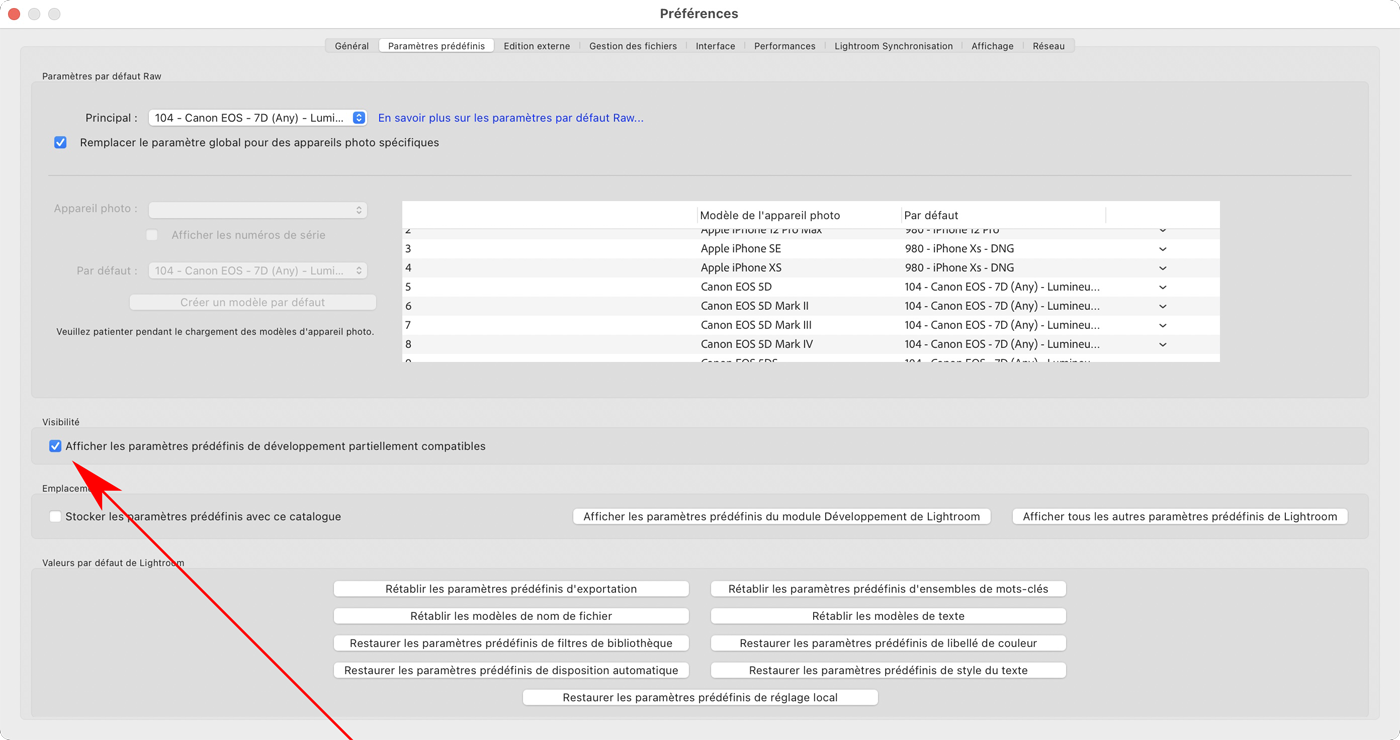 ***** In Lightroom Classic Preferences, in the “Predefined Parameters” Tab : check “Show Predefined Partially Compatible Dev. Parameters” … This will be essential to modify the “Default Dev. Parameters” of some Camera.
Easy installation in Lightroom (Cloud): on Mac and PC
- After purchase download the files which are compressed in the form of a “.zip” archive
- Unzip the “.zip” archive by double-clicking on it
- Open Lightroom, view a RAW file, then go to the Develop module
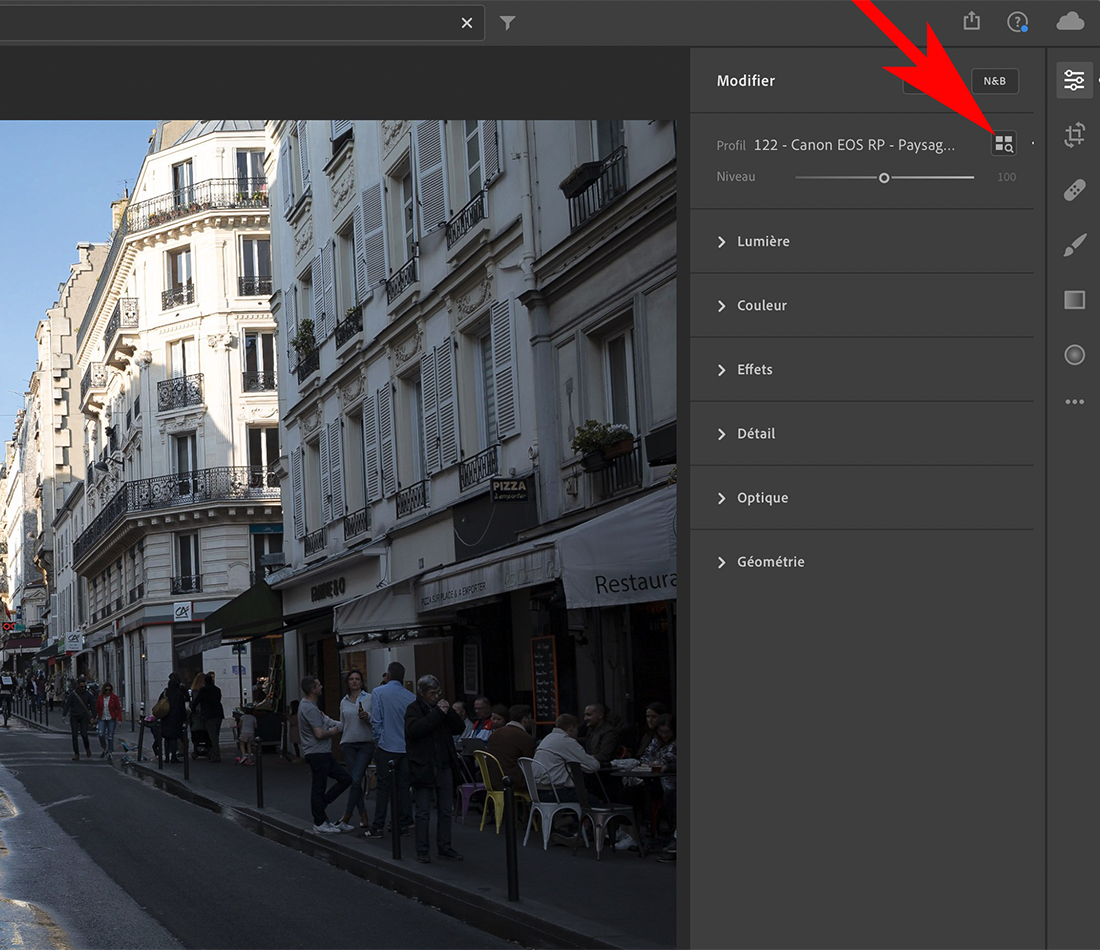
- Click on the Profile Explorer ( fig. 1 ) then click on the “3 dots” ( fig. 2 )
- Then on “Import profiles…”
- Select your profiles in the folder you downloaded then “Import” ( fig. 3 )
- Your profiles are now available
- I recommend that you click the star (on the right) to add them to your “Favorites” ( fig. 4 )
- From the list of Favorites profiles, you can quickly select a profile
Optional: adjust the Level slider to your liking : for an application from 0% to 200% ( fig. 5 )


Installation in Photoshop’s Adobe Camera Raw Module on Mac and PC : Manual method. WARNING : I recommend that ACR users preferably use the “manual method”, (described above for Lightroom Classic).
If you do not have Lightroom: it is the same to manually drop the profiles (or the entire Profiles folders, it doesn’t matter) in the appropriate “Settings” folder, which was previously created by Adobe in your system * . And here are the paths on Mac and PC :
Sur Mac : UserName > Library > Application Support > Adobe > Camera Raw > Settings
Place the profile folders directly in it. Or profiles out of their file: it’s the same.

Sur PC : C:\Users\UserName\AppData\Roaming\Adobe\CameraRaw\Settings
Place the profile folders directly in it. Or profiles out of their file: it’s the same * .

* Note: I recommend Lightroom Classic users to uncheck the option “Store Presets with Catalog”. Which is in the “Predefined Parameters” tab in the Preferences (it is fortunately unchecked by default).
Installation in Photoshop’s Adobe Camera Raw Module : on Mac and PC: second method. Otherwise here is the other method (which does not work for some users, I do not understand why)…
- After purchase download the files which are compressed in the form of a “.zip” archive
- Unzip the “.zip” archive by double-clicking on it
- Open a Photoshop RAW file
- Click on the Profile Explorer ( fig. 1 )
- Then click on the square button with “3 dots” ( fig. 2 )
- Then on “Import profiles…” ( fig. 3 )
- Select your profiles in the folder you downloaded then “Import“
- Your profiles are now available
- I recommend that you click the star (on the right) to add them to your “Favorites” ( fig. 4 )
- From the list of Favorites profiles, you can quickly select a profile
Optional: adjust the Level slider to your liking : for an application from 0% to 200% ( fig. 5 )


 The little trick : in addition to the profiles which will be useful to you, you can download the “separator files” which are optional (depending on the case, they are already in your downloaded folder, or to be downloaded separately).
In this example on the right, they are named: 400.xmp, 416.xmp, 417.xmp, etc …
In practice these “files” are useless … But they serve as “visual separator” in your list of profiles (possibly cluttered). As you can see from my example (lots of profiles for other devices).
So, I recommend that you download and add these “separators” to your favorites: so that they (also) enhance your Favorites menu.
However, if you don’t like the idea: you can safely remove them.
|
ANLEITUNG IN DEUTSCH INSTALLIEREN Practical tutorial : Vital tip – Automatically combine a Color Profile “Default Preset” and an “Adaptive ISO Preset”
|
If you have any question or problem, please do not hesitate to contact me here.
Thank you.
| CANON PROFILE ⎪ NIKON PROFILE ⎪ FUJIFILM PROF. ⎪ SONY PROFILE ⎪ PANASONIC PROF. ⎪ LEICA PROFILE ⎪ APPLE PROFILE ⎪ OTHERS ⎪ ISO ADAPTATIF ⎪ NEGATIVE FILM PROF. |